
Let’s create our first dashboard.
Scenario
John (our hypothetical manager) is back in the office again today because his golf date got rained out. He loves the new custom report we created and now wants a custom dashboard he can look at which summarizes all the key website metrics. John would like to see the the following snapshots: Revenue, Top Products, Top Marketing Mediums (which drive revenue).
Here’s how we’re going to approach setting up John’s custom dashboard.
- Dashboard Planning: We’re going to outline what our report needs to accomplish.
- Basic Setup: We’re going to create a new dashboard
- Widget Configuration: We’ll add the widgets needed.
- Dashboard Testing: Does the dashboard do what we meant it to do?
- Dashboard Sharing Options: Review the sharing options.
Onward!
Step 1: Planning
John has informed us that he wants the dashboard to contain 1)Revenue 2) Top Selling Products, and 3) Top Marketing Mediums (which drive revenue).
The Dashboard “widgets” which we’ll need are:
- Revenue
- Products
- Mediums
That’s it, now let’s start building it!
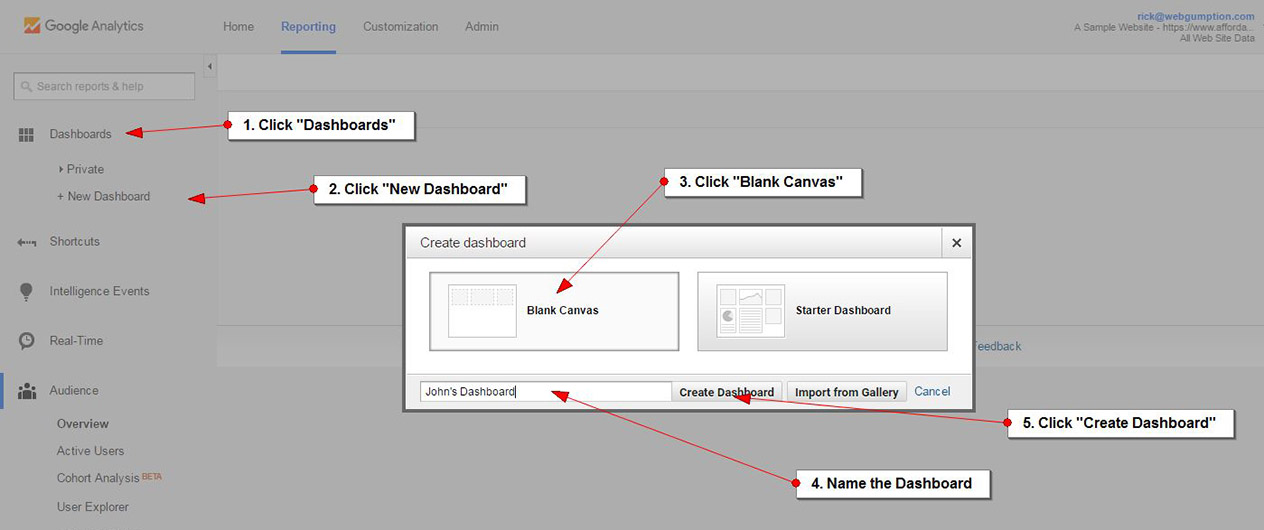
Step 2: Basic Setup
Now, let’s create the dashboard
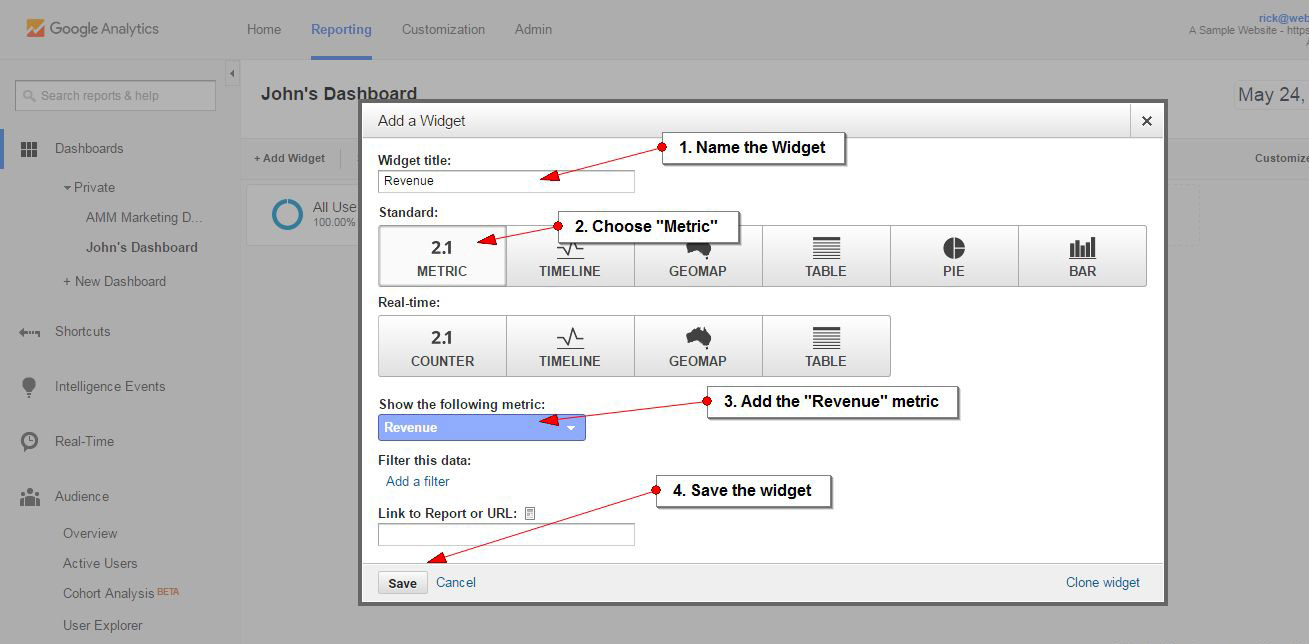
Step 3: Widget Configuration
For our custom Dashboard, we need to add 3 widgets.
Add the Revenue widget
Add the Medium Widget

Add the Product Widget

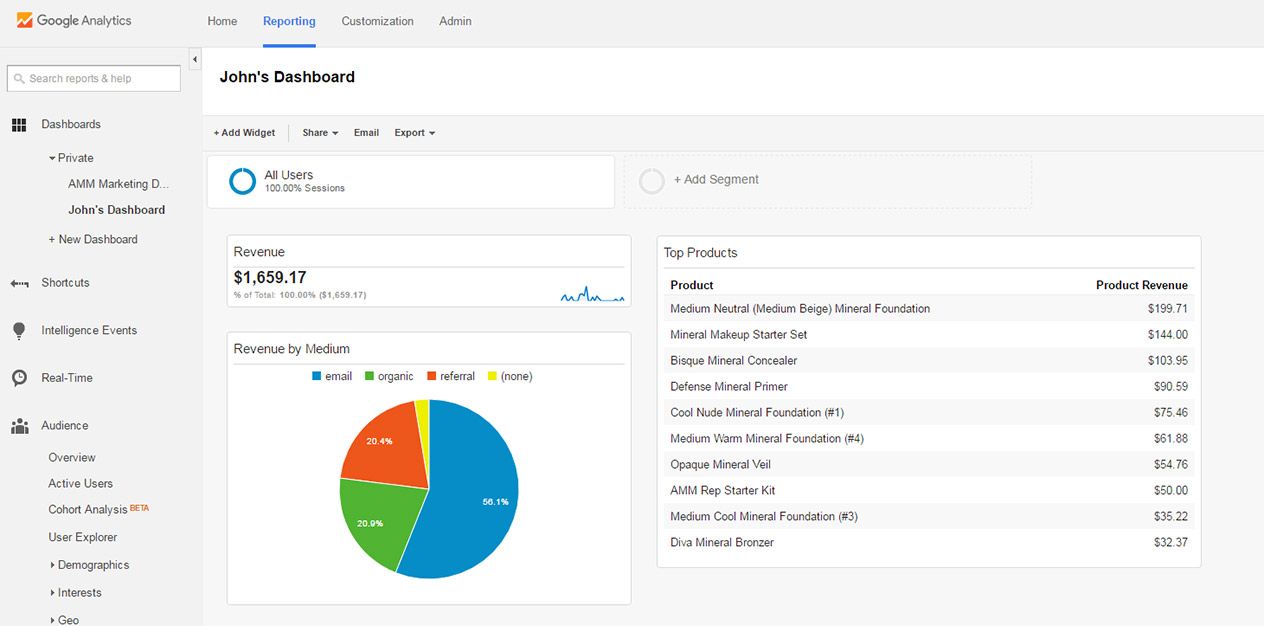
Step 4: Dashboard Testing
John asked us to report on Revenue, Top Mediums, and Top Products. Looking at the new dashboard, it looks like we got it right!
Step 5: Dashboard Sharing
We can share our new dashboard with John and other members of our organization in a few ways. Using the controls at the top of the Dashboard, we can export it (as a PDF), email it (and set up automatic emails) and share the template itself so that John can see it.