
In this lesson, we’ve review the basics of setting up Ecommerce tracking in Google Analytics. Setting up Ecommerce tracking takes 2 steps:
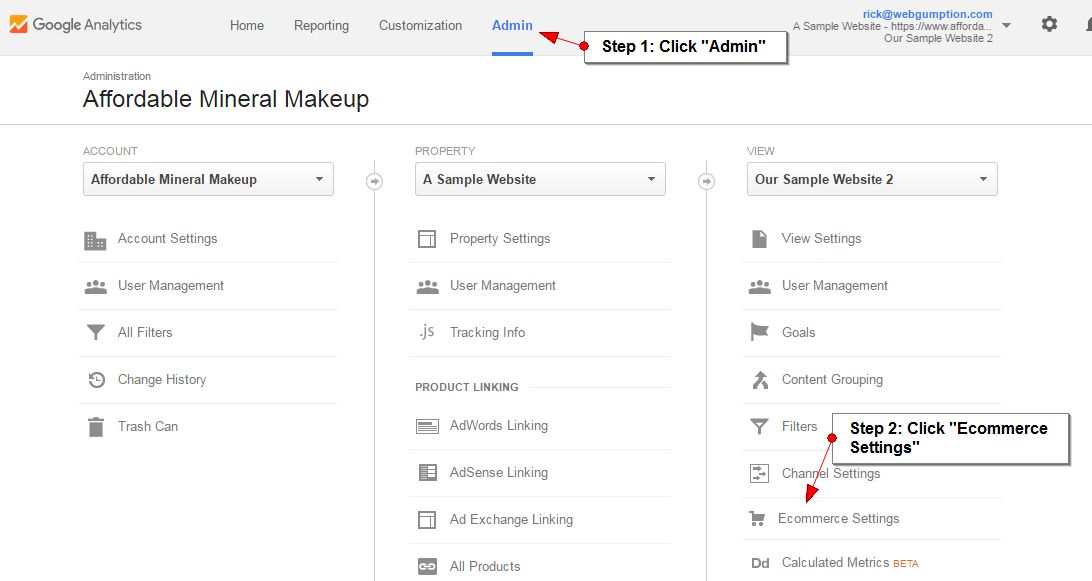
Step 1: Enable Ecommerce Tracking in Google Analytics
- Click “Admin” on the top navigation
- Click “Ecommerce Settings” under the “View”
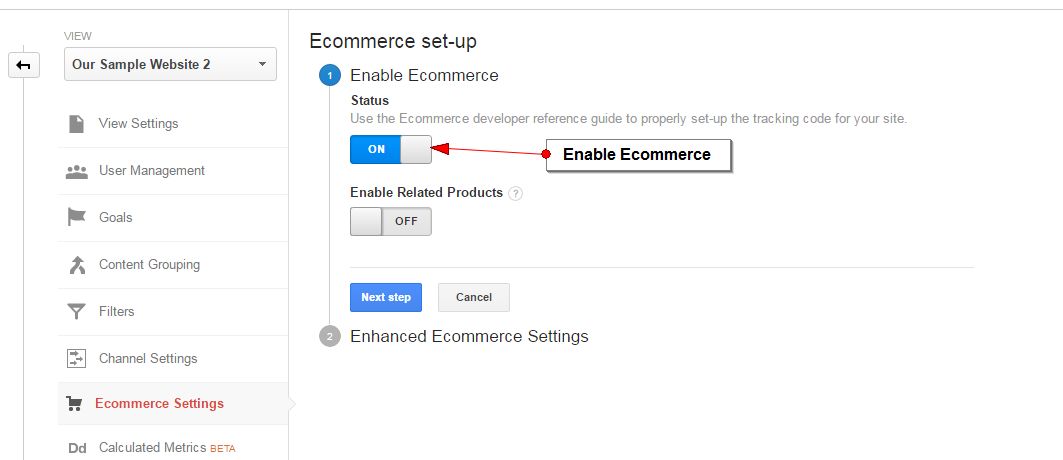
- Enable Ecommerce
Step 2: Programming Your Website
Once ecommerce tracking is enabled in Google Analytics, Google is now ready to begin receiving ecommerce data. At this time, you’ll need to program your website to send the appropriate transaction information. There are few different options for this.
- Hire a programmer (recommended): Implementing Google Analytics ecommerce tracking can be complicated and in some cases, requires a knowledgable programmer to assist. If you choose this option, you’ll want to send the following documentation to your developer.
- Utilize a Plug-in: If your website is powered by a popular CMS (content management system) such as WordPress, Magento, Shopify, or others, configuring Google Analytics ecommerce tracking can be handled through the website configuration or a third party plug-in. You’ll need to refer to the documentation provided by your CMS to assist with this. Below, we’ve provided a summary of popular CMSs including how ecommerce tracking is most-easily implemented.
Installing GA Ecommerce Tracking in Your CMS
- Woocommerce: Woocommerce users can install WooCommerce Google Analytics Integration, a free, easy to use plug-in.
- Magento: Google Analytics ecommerce tracking is built-in to Magento, here’s a great tutorial on how to configure it.
- Shopify: Google Analytics ecommerce tracking is built-in to Shopify, here’s a great tutorial on how to configure it.